 (click on pic to enlarge)
(OR To RETURN click
.\..\NGpage
TO MAIN JBCAREY page)
(click on pic to enlarge)
(OR To RETURN click
.\..\NGpage
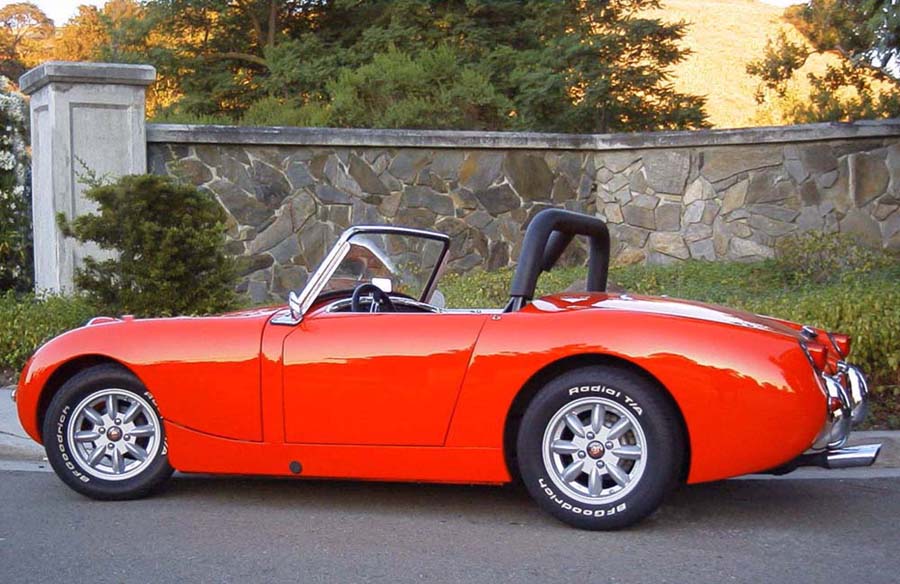
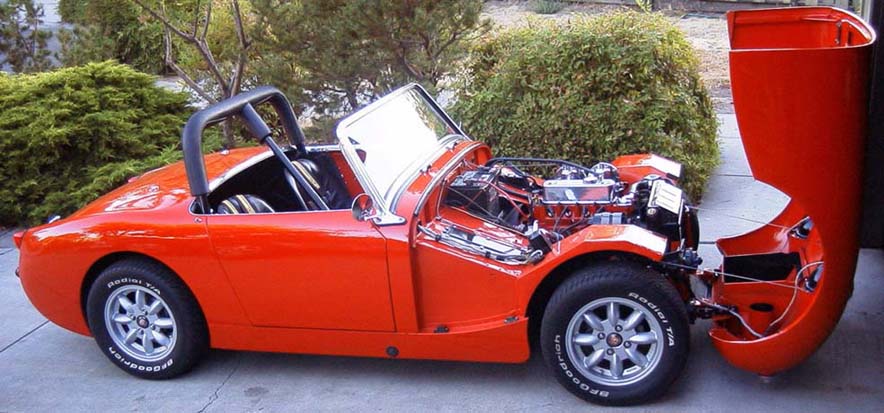
TO MAIN JBCAREY page)1961 Austin Healey "Bugeye" Sprite MKI
("Frogeye" in UK) (click on pic to enlarge)
(OR To RETURN click
.\..\NGpage
TO MAIN JBCAREY page)
I bought this car in 1989, and like most, it is an ongoing project. It has so far been accomplished in four major phases: 1) initial ground up using a good stock 1275 and ribcase tranny. 2) Re-fit of a new drive train including 1380 cc offset bore and Datsun 5 speed tranny. 3) Leather Interior. 4) New improved HIF44 Carbs
PHASE 1: GROUND UP RESTORATION
All modifications for performance, braking, and handling are bolt-on’s bought or forged by myself to keep from permanently altering the car. I have achieved an improved car in every way and get many comments for the retained and lovingly detailed British look. The car is a ground up restoration (every nut and bolt, part or surface is new, polished or restored). It has bolt on front disk brakes (later Sprite), new lines, and hydraulics. It used a 1275 with 1- 1/2" SU’s, header, electronic ignition inside the 45 dist. and a good head w/o smog stuff. Ribcase - ugh. Has front KYB tube shocks adapted with my own forged parts - stiffer/ lowered front springs, and anti sway bar. Has rear tube shocks, (not radical or you get too stiff here) and (forged myself) lowering blocks and panhard rod (to keep the differential from moving laterally). - Aluminum fined brake drums with built in 3/4" wider track. 7/16" lug nuts/studs are added here. With bolt on MiniLite reproduction wheels and it’s sitting pretty. (5 sprite hood ornaments are used in addition to the one on the front - 4 on wheels and one on leather steering wheel center used as the horn button that actually honks make for a sharp look - (so I’m told). Now after all that, the car was a "slider" and scared the P-Whatten out of me until I made the single best $1000 purchase of all, LIMITED slip differential! Now it’s "point and punch" for rollercoaster cornering. It takes the hardened rear axles to allow this. These brought alive all the other suspension modifications. I have put in a cross flow radiator (spriget) but have built mounting frame out of a disassembled bugeye radiator so that at first look it appears stock. Bonnet is forward opening on hinges I forged to use existing holes to bolt up. New wiring harness, negative ground Lucas Alternator (no trouble in 5 yrs.) and elec tach behind bugeye face round out a "no darkness car". I did solder up all those pesky press-on wiring junctions. Oh, I built the roll bar- 5 point, and added racing belts. This combination served fairly well from 1993 to 1997, but the ribcase was failing and I longed for a competitive engine.
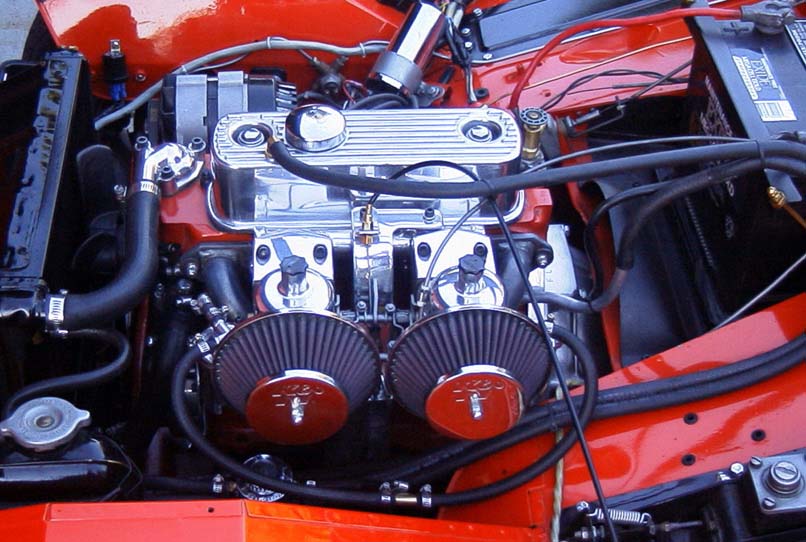
PHASE 2: 1380 DRIVE TRAIN w/5 SPEED - and MORE
 (click on pic to
enlarge) (see new carb pics below):
(click on pic to
enlarge) (see new carb pics below):
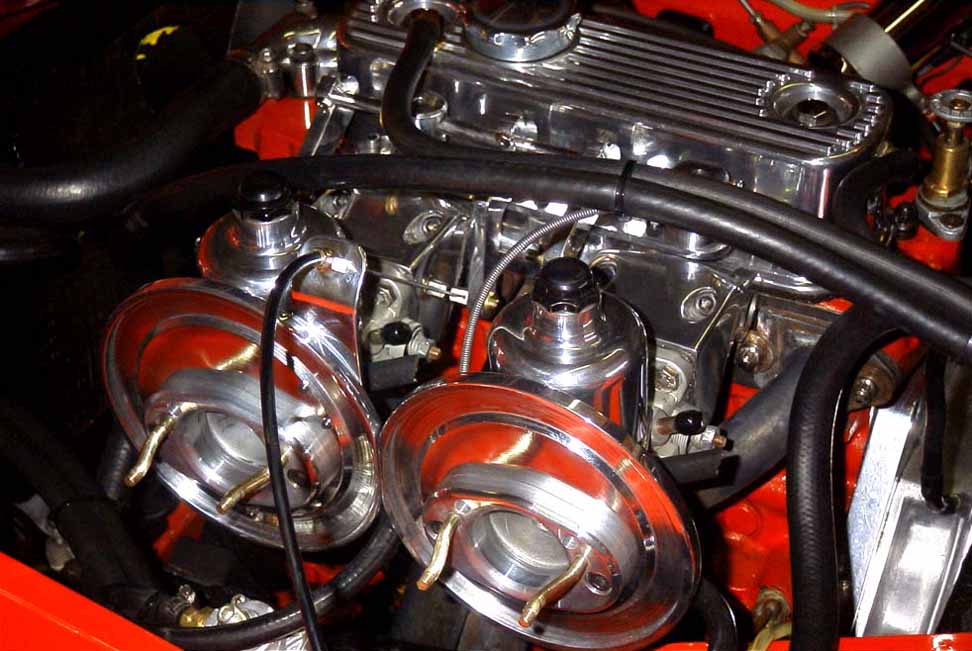
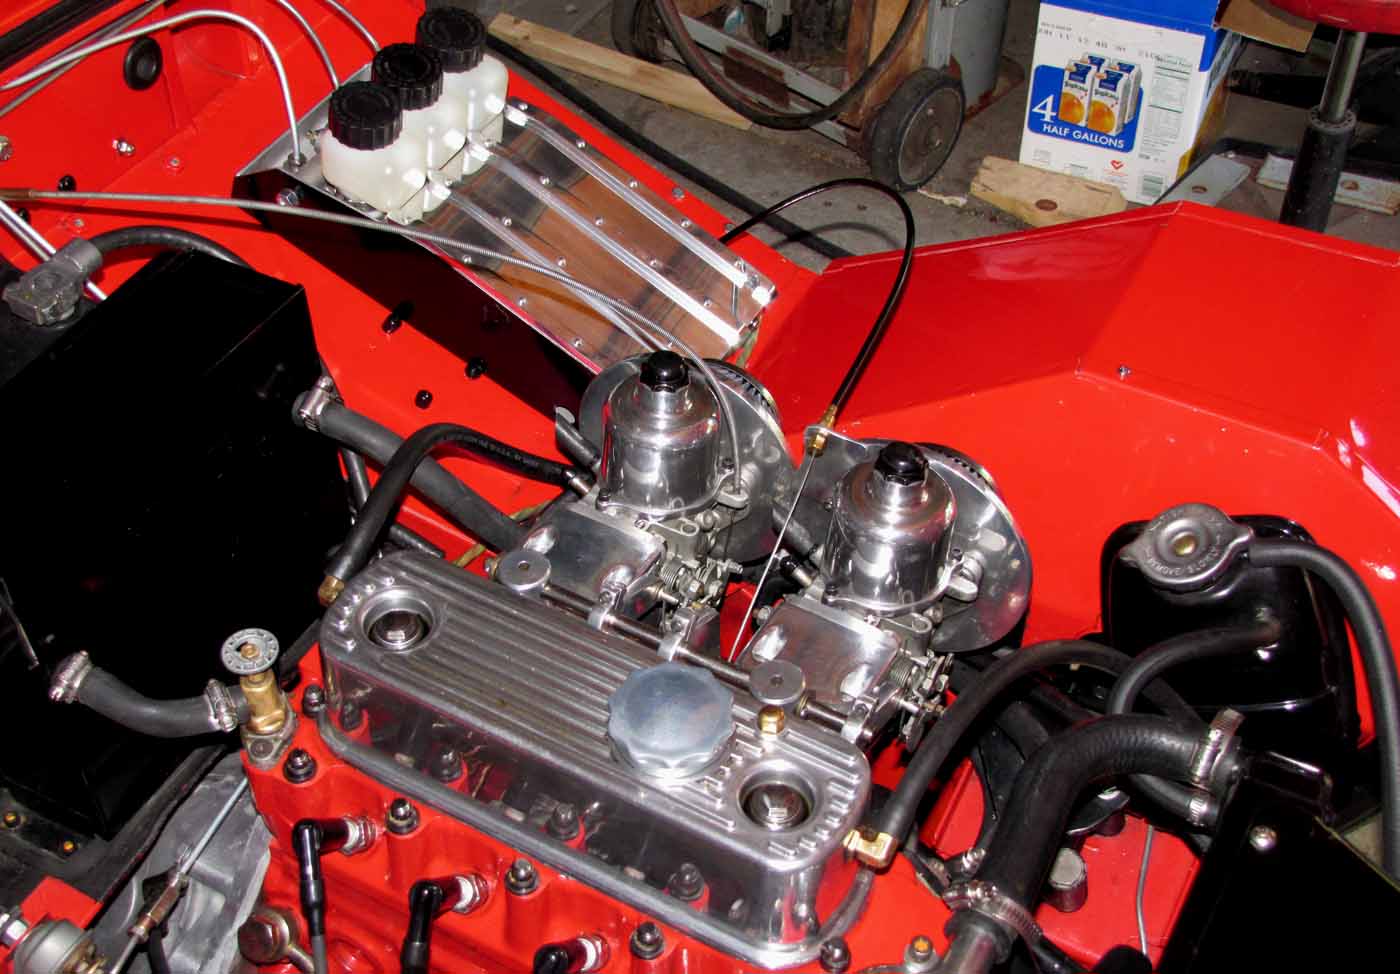
With the idea of staying British and "bolt on", I started beefing a 1275 that was purchased for rebuild to 1380 cc. This required offset bore since 120 Thou. overbore would punch out walls between cylinders if done on center. Center cylinders (2 & 3) have to move 10 Thou. outward, and outer cylinders (1 & 4) have to move outward 20 Thou. This would be costly if ordered from a machine shop. I had a machinist at my workplace build a torque plate with all the cylinder bores and head bolt holes to bolt onto the block. This did two things, 1) allowed a quality machine shop to use these correctly spaced cylinder holes to align the boring, and 2) when properly torqued to the block, allows a precision final hone with the cylinders "stressed" as if a head was in place. This torque plate is now available for future engine builds. The crank, rods, front damper, lightened flywheel, and clutch were provided to the machinist to balance and line bore if necessary. As it turns out, he machined the center main bearing (oversized) cap so that when all caps were properly torqued, the line bore was correct for crank installation. I started assembly using 73.5 mm Hepolite pistons and chrome rings, a Krane cam, front cam belt (timing adjustable) kit, longman head, roller rockers with 1.5" lift, long branch header, and rear main seal kit. The assembled engine was then fitted to the Datsun 5 speed tranny using a conversion kit. It turns out that the rear main seal kit required modifications to the aluminum adapter plate of the tranny conversion kit. Even though both kits were purchased from the same after market place, no mention was made of this incompatibility. The assembled unit was then placed in a test stand made from a rust bucket front engine frame. I'm using 1 3/4" HS6 SU carbs that required an aluminum manifold and machined spacers I built to properly port and place on the longman head with bonnet clearance. I added an over capacity dampered oil pan (I made it), plumbing, and temporary clutch hydraulics to test fire the combination. New electronic ignition to fit the Aldon recurved distributor worked well thru a 42KV coil. I use the new Bosh Quad platinum tip plugs. Adjustments to the clutch were easy in this stand. After initial low speed runs in the car, an oil cooler was added which brought the total capacity to almost eight quarts - moved by a high capacity pump, and an oil temp gauge does the monitoring. K & N air filters added function and form to the SU's. A rotary (quiet) electric fuel pump was added just in front of the gas tank, and the mechanical pump was replaced with a crankcase breather fitting. As I began to realize the new potential of this power plant, I decided to fit double bearing rear axle kits for peace of mind in 5th gear. This too, required modifications for the bugeye with no apology from the retailer!
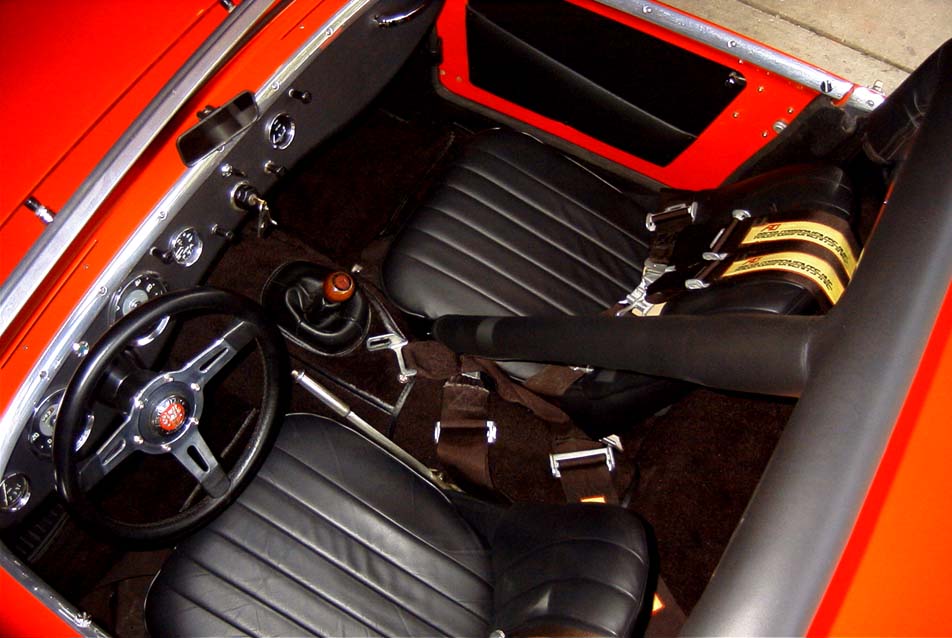
PHASE 3: New Interior (A/O May 2000)
-  (click on pic to enlarge)
Being happy with the engineering and reception that this car has received, it was time to finish the interior. I had not done the doors, was using hand me down seats, and the roll bar was not covered. (shame-shame) Now, the sterring wheel, shift boot, dash, door pockets, seats, and roll bar cover are done in matching leather. Seats were a kit, and the rest was done from a half hide. It's fun to have the car "smell new" which it deserves. _ Now to auto cross it!
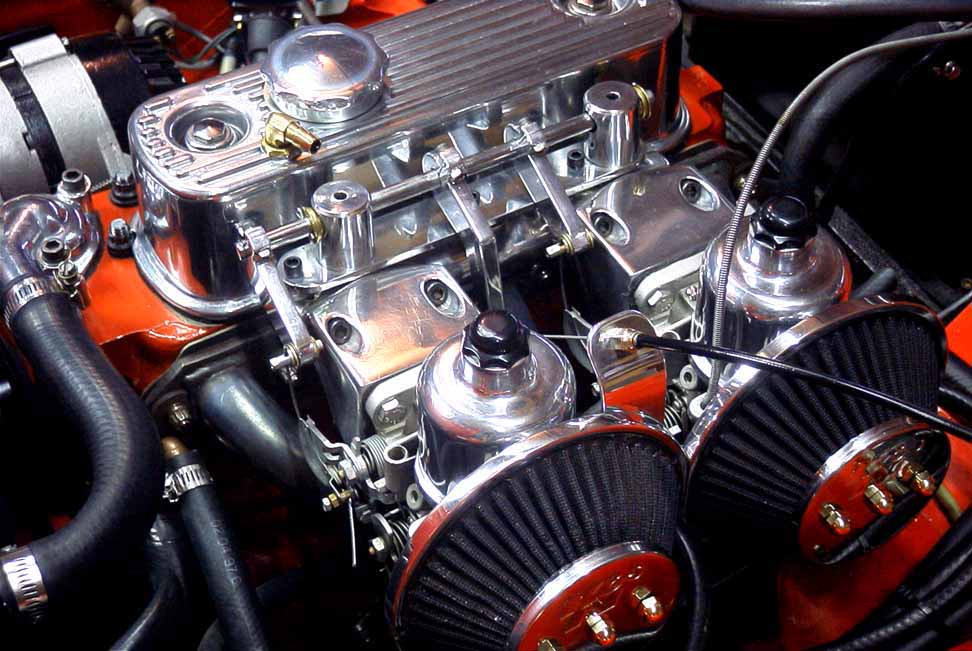
PHASE 4: New Carbs (A/O Feb 2001) -
 (click
on pic to enlarge)
(click
on pic to enlarge)
HIF 44's on the same manifolds... I've had these carbs on since
the summer of 2000 but they needed good mechanical linkage and the air filter back plates
had to be made to fit the K & N cone filters and to fit the billet stub stacks:
 (click on pic to enlarge)
With that, adjustment of the synch, air, and fuel have now begun
to produce consistent performance that does justice to the 1380 cc's. Time, a dyno
test, and further racing against a Weber set up should tell if staying with big SU's is
acceptable. 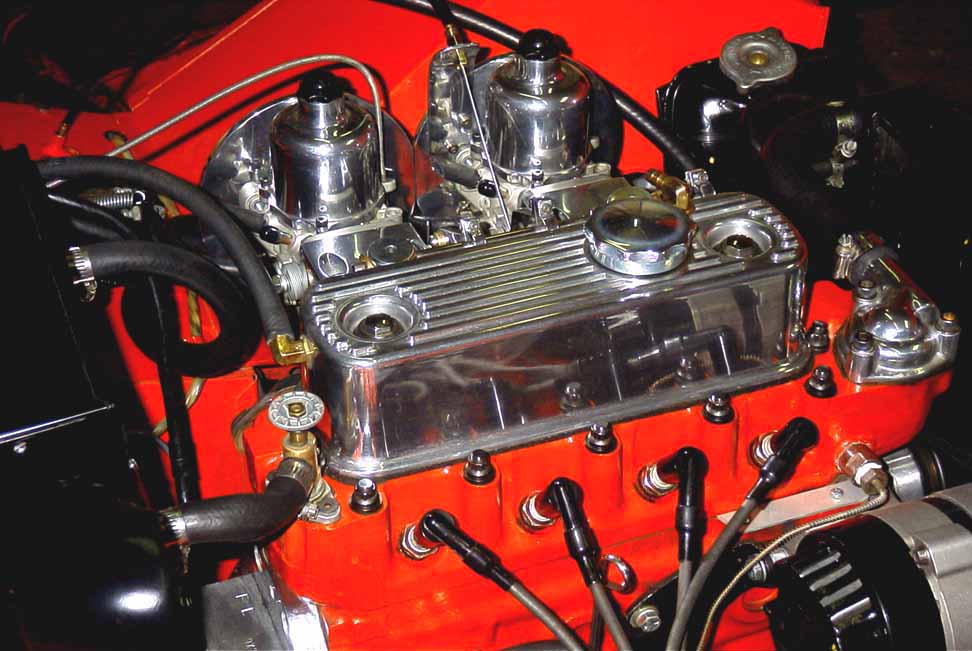 (click
on pic to enlarge)
(click
on pic to enlarge)
The HIF44's have intergal float chambers, ball berring dash pots, and spring centered needles. The mechanical linkage was made to use these non-paired carbs which would not fit with stock linkage in any case. This linkage is bronze bushed and very adjustable. This has worked out very well! (a/o 2014)!
PHASE 5: Brakes, etc.... 4 wheel
 |
 |
 |
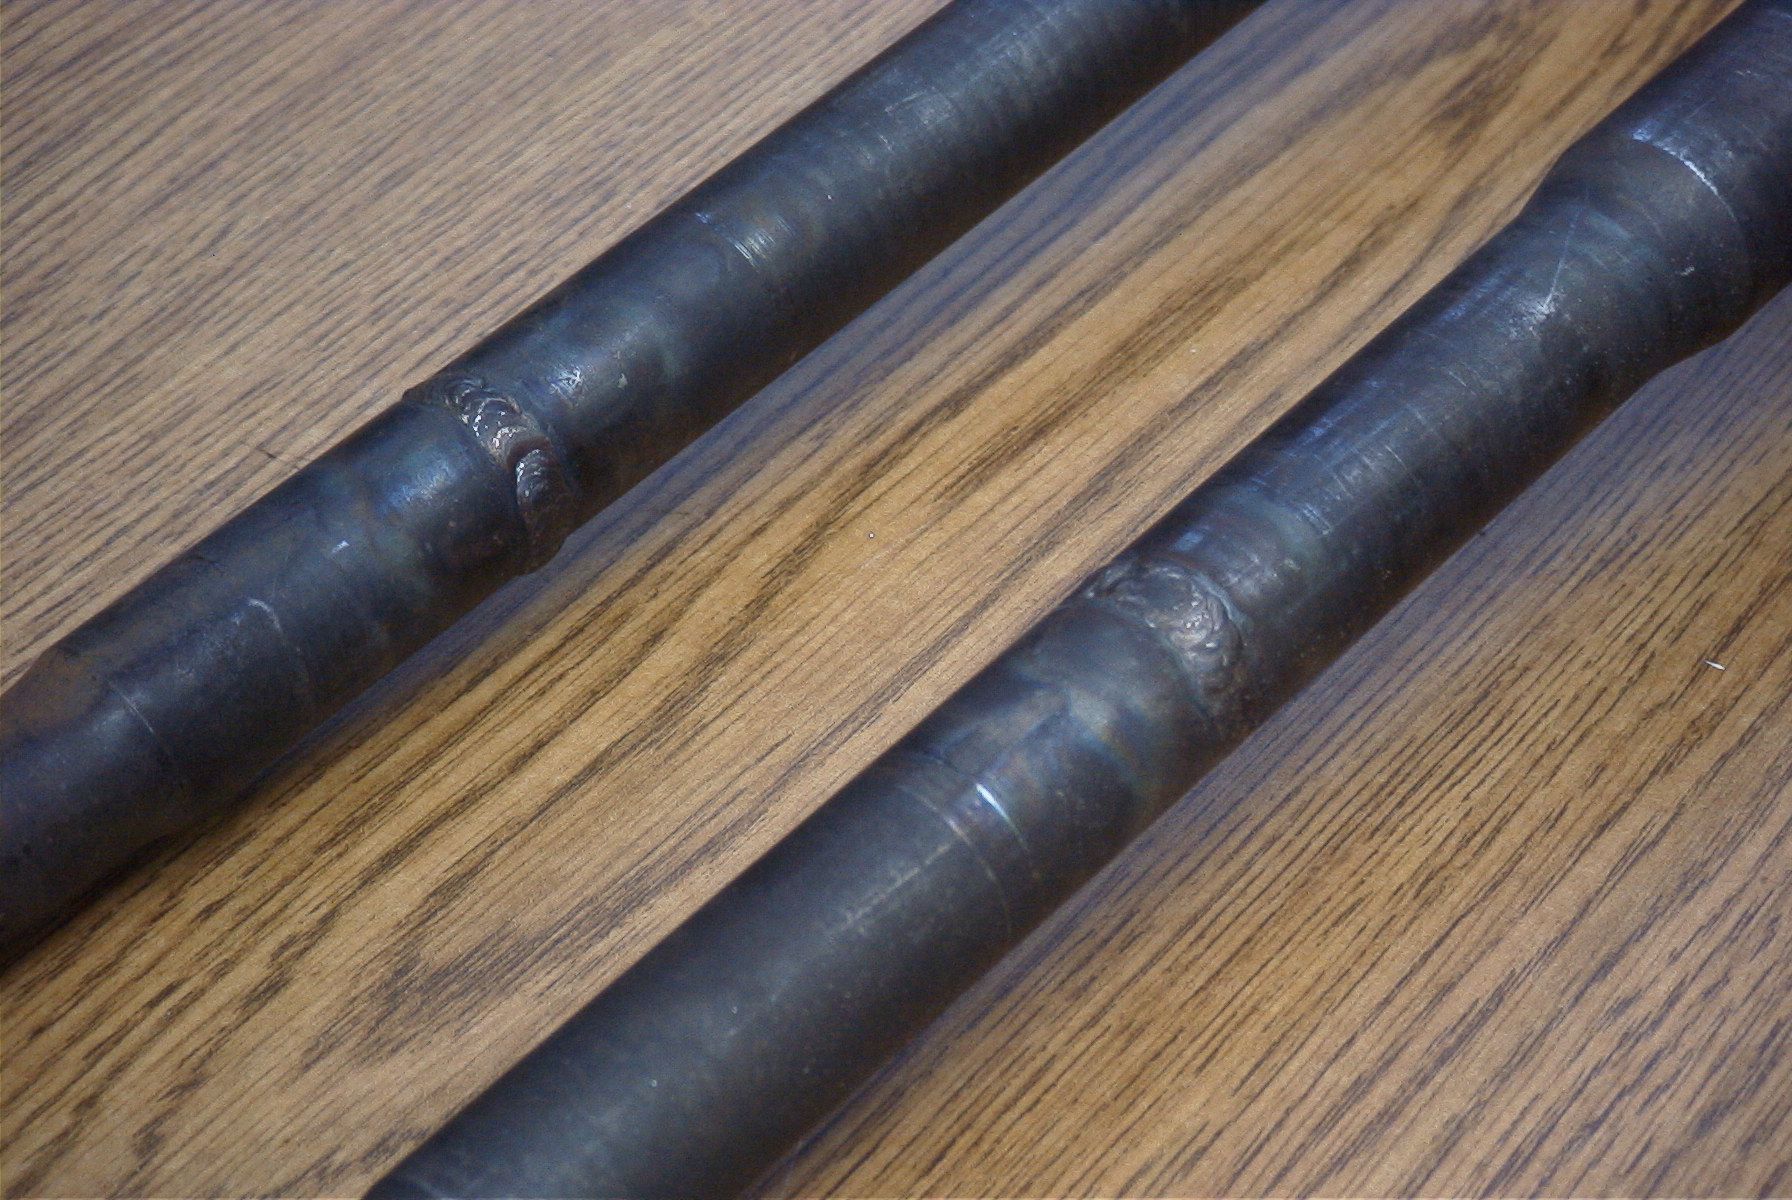 |
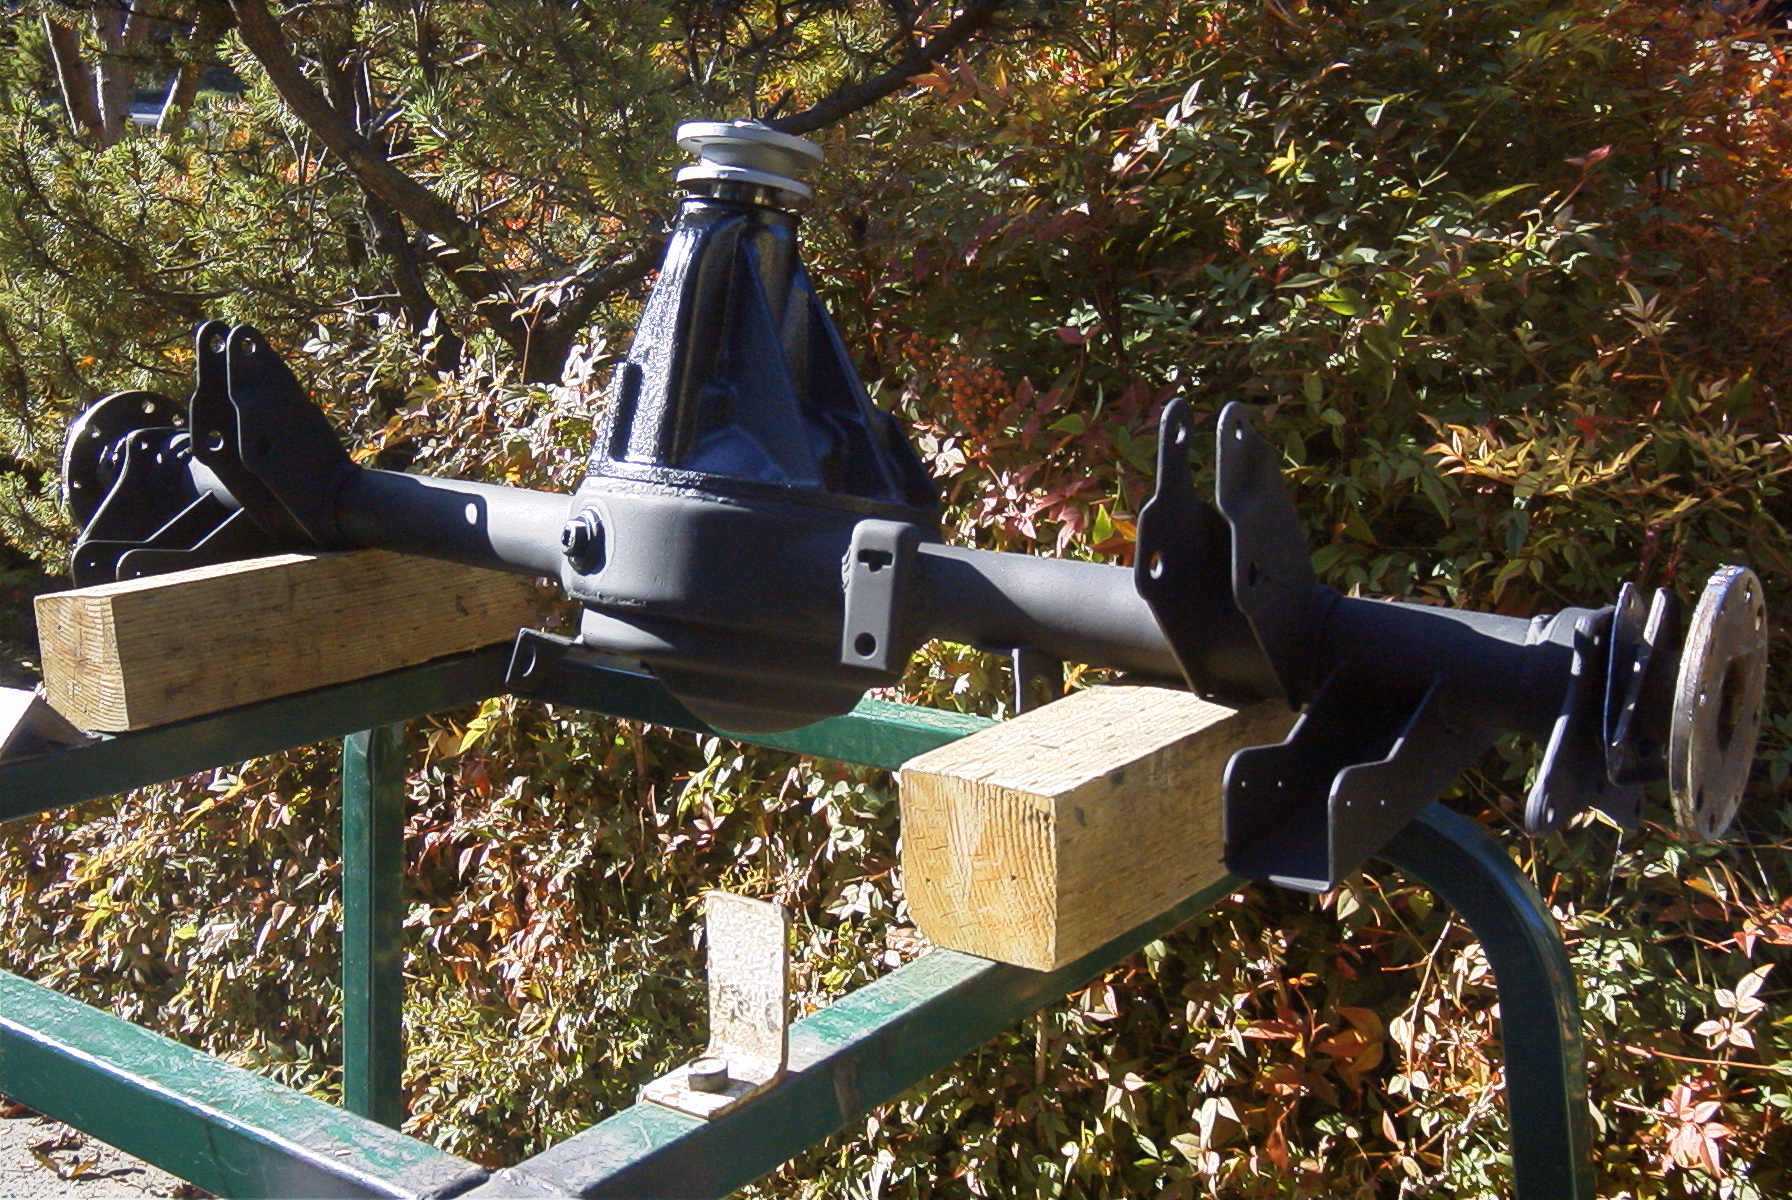
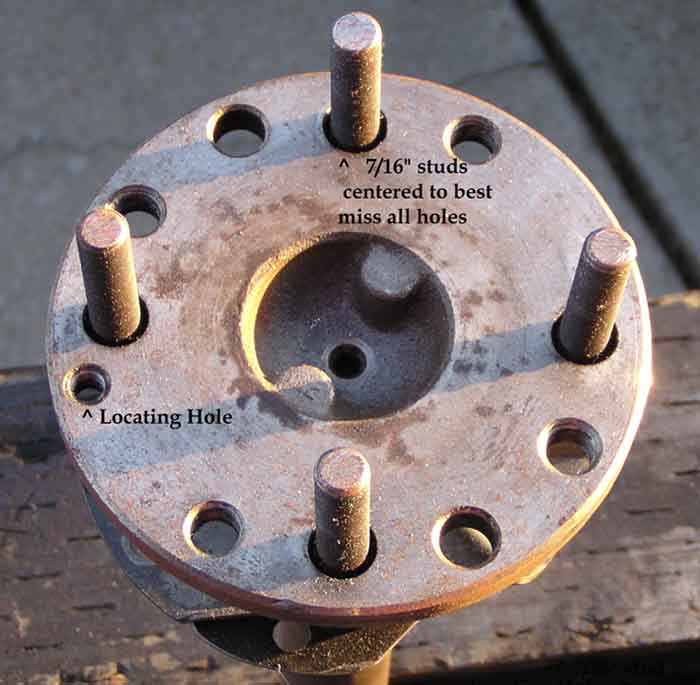
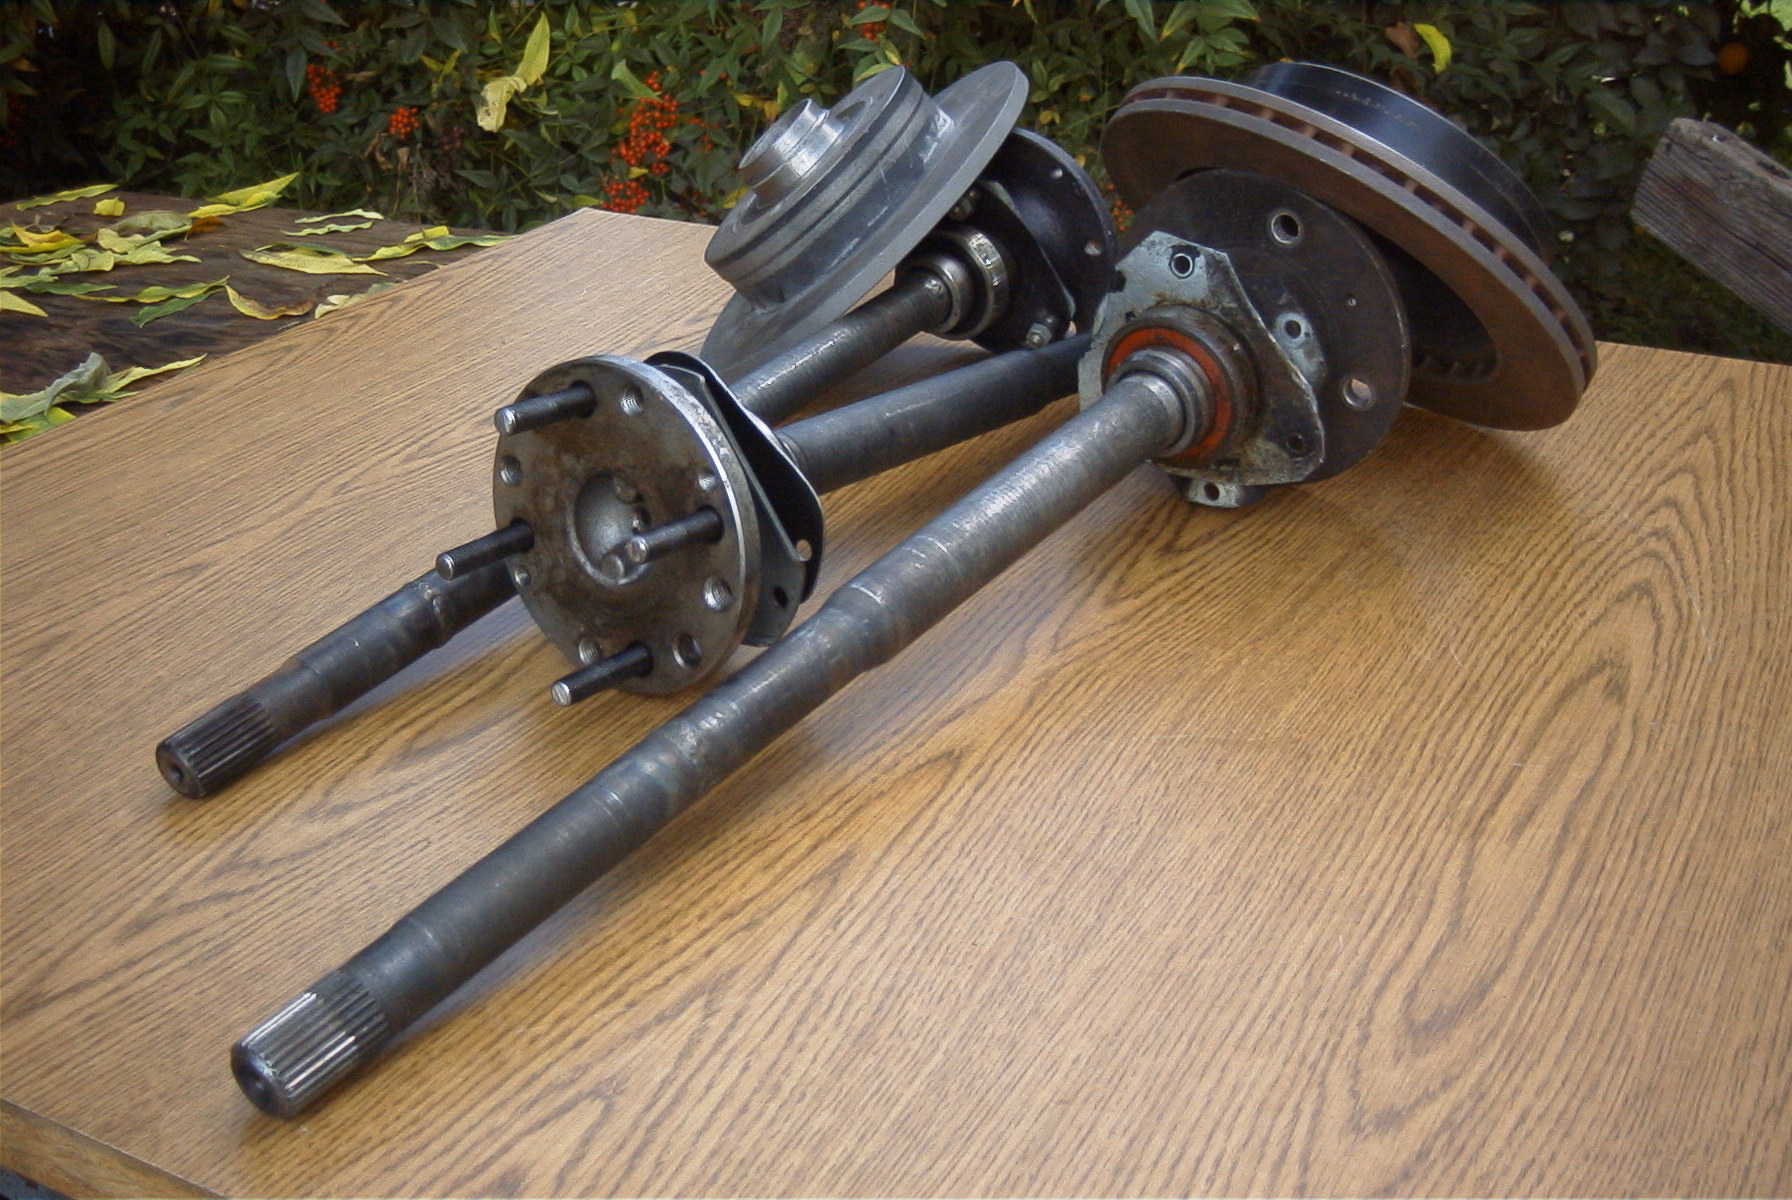
Having found that LSD (limited slip diff) is one of the best improvements to handling, I sought out the best solutions which gives rear disk brakes as well. It is a shortened and modified to bolt in Mazda RX7 solid diff from around 1984/5. This requires a new drive line, linkage setup for the E-brake, modified (shortened) RX7 donor diff, and repositioned and larger wheel studs ( 7/16th in.) This is a great conversion, bullet proof, and a 4:10 ratio that is great for the 1380 engine/5 speed. Shown are but a few of the steps required for this repeatable (documented) conversion.
 |
 |
IMG_36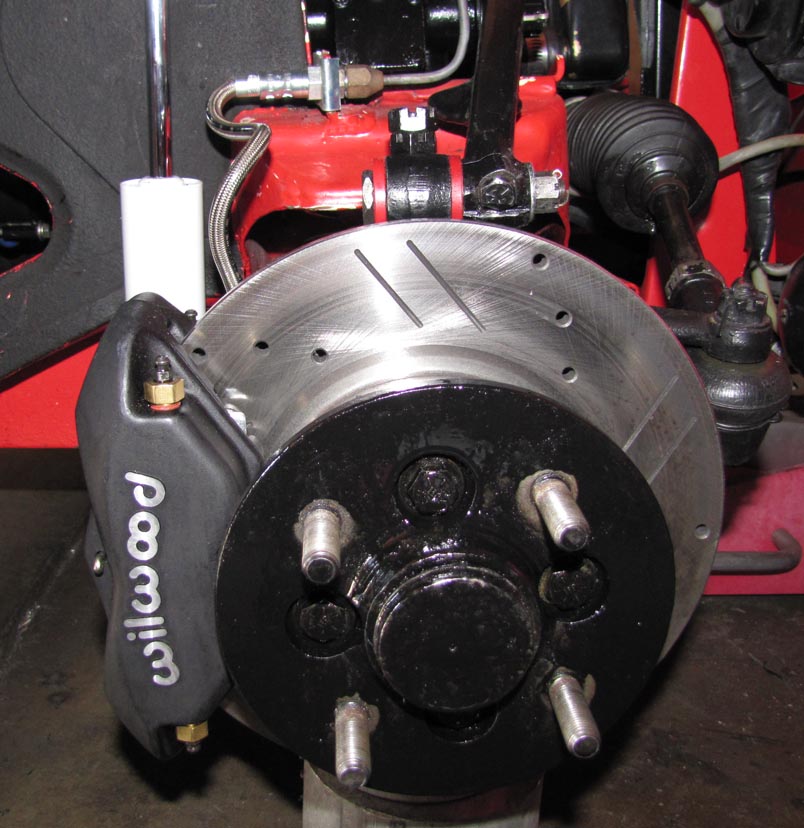 95e.jpg 95e.jpg |
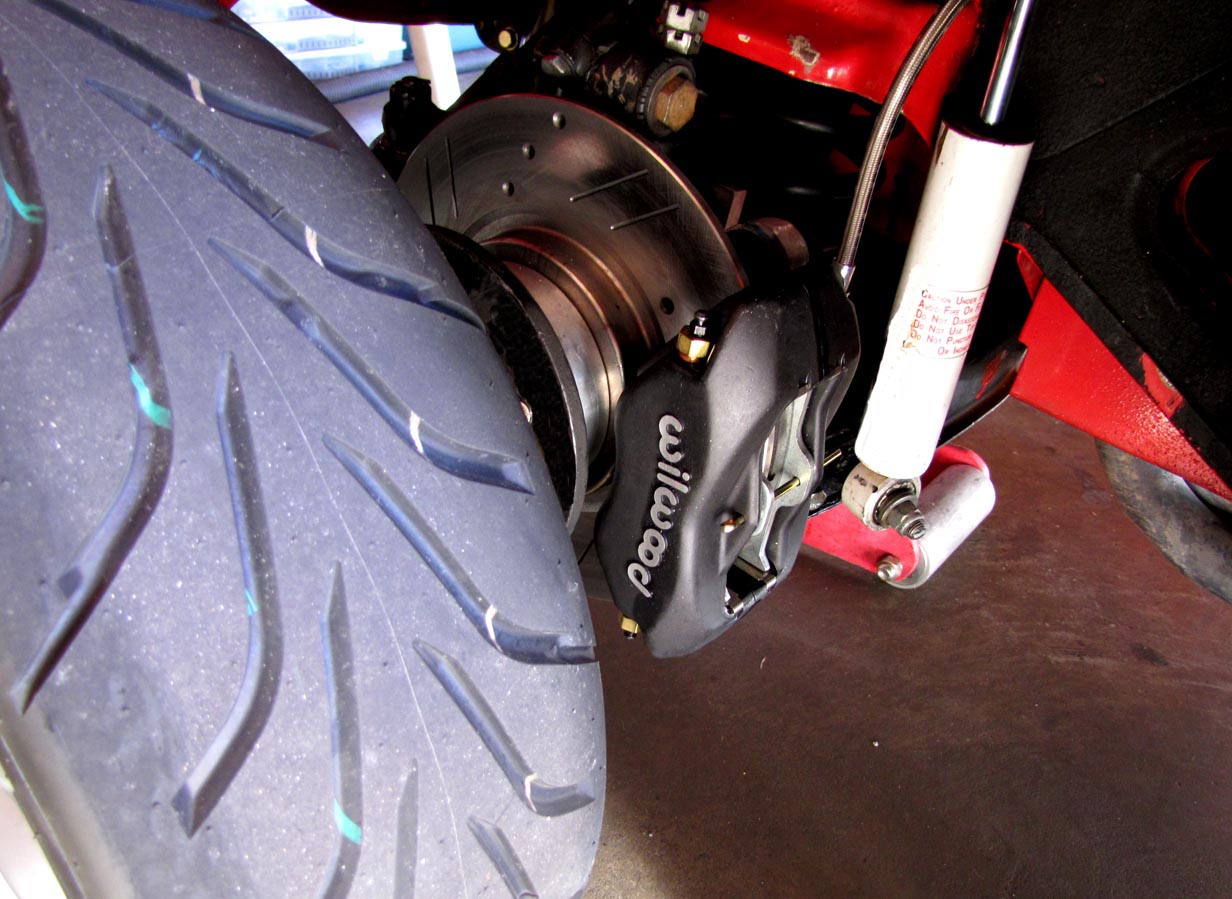 |
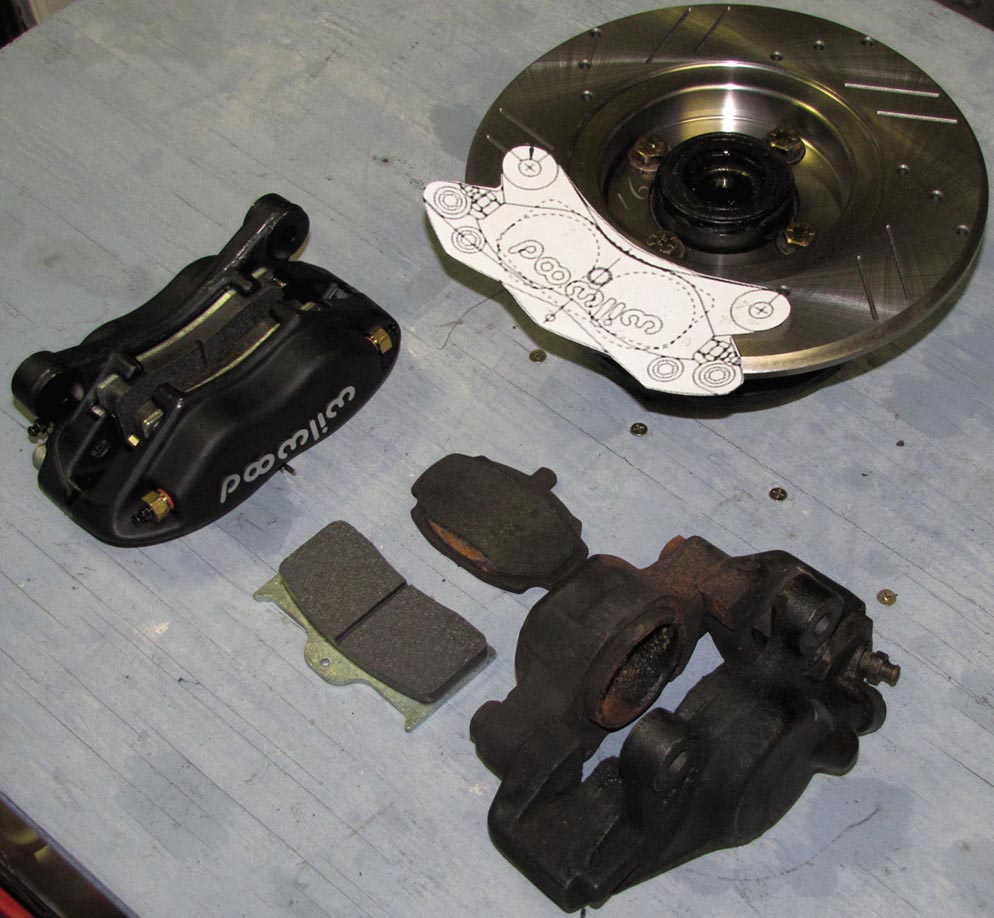
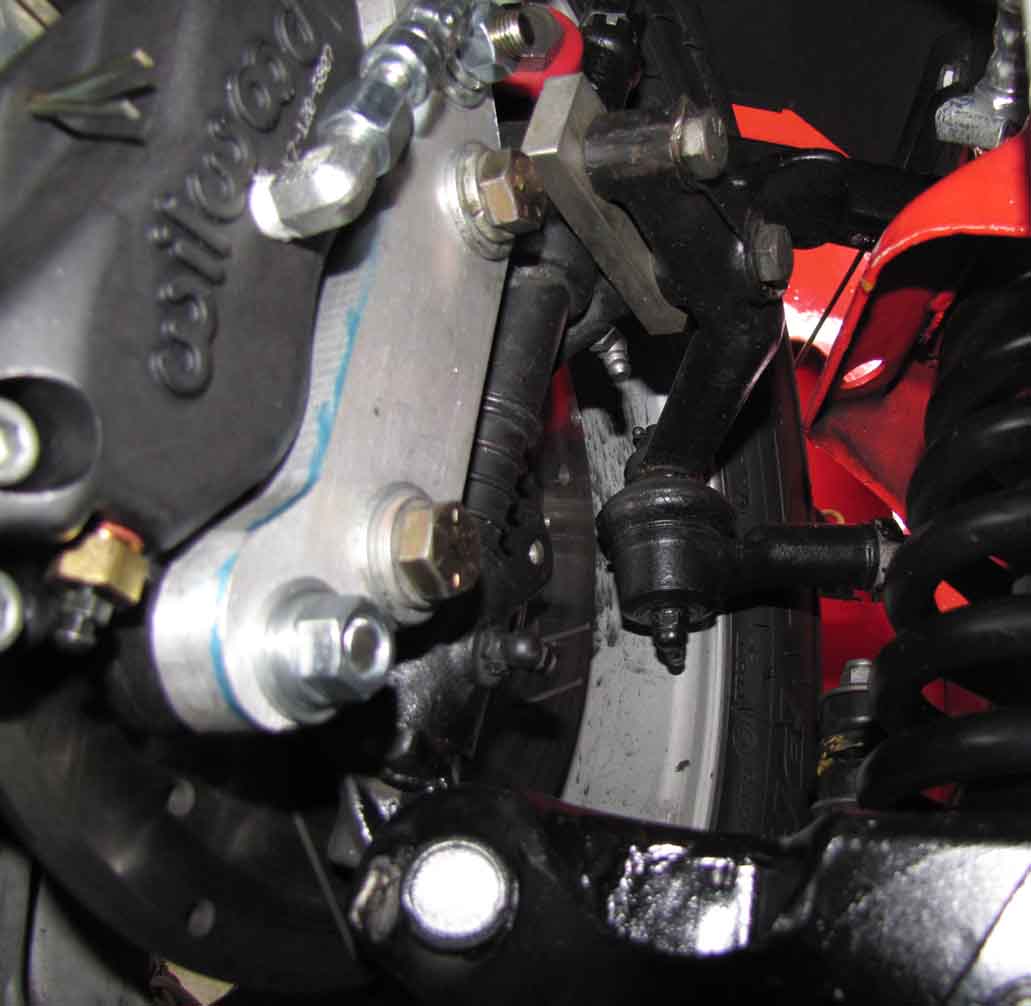
Having used the MGB caliper/spitfire rotor upgrade for several years, I wasn't happy with the MGB caliper single piston and it's longevity. But it was a start and the kingpins, etc. are necessary to any front disks. From there, I engineered adaptors to fit Wilwood two piston calipers which also give the best swept area disk pads that can fit the Spitfire rotor. (see old and new size comparison of the picture in the upper left). This is a much improved and reliable setup and worthy of true race tires to put it all to the ground.
 |
 |
IMG_2981e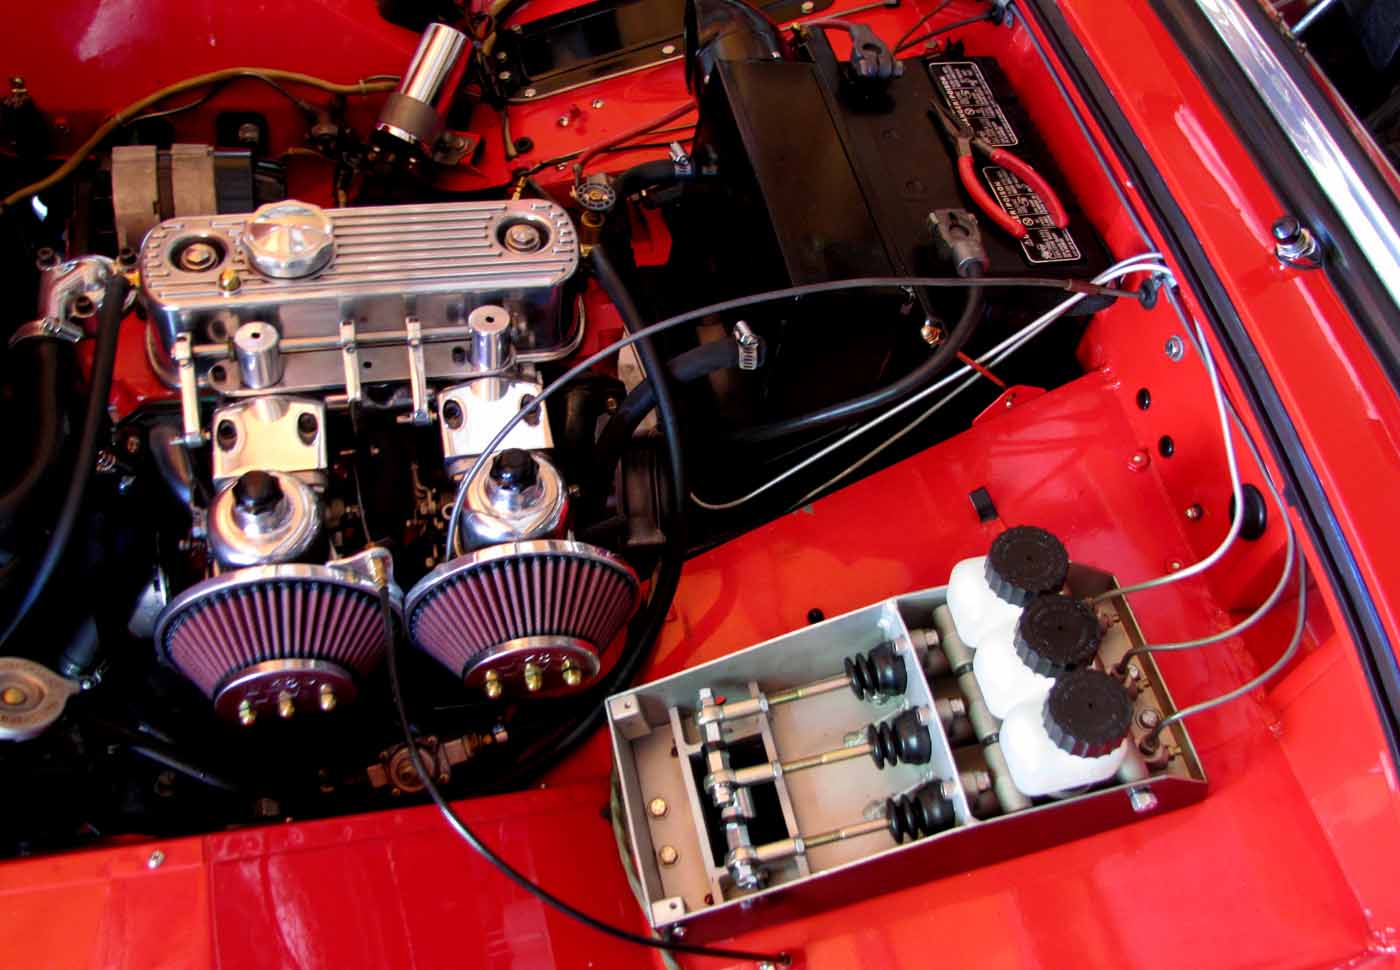 .jpg .jpg |
 |
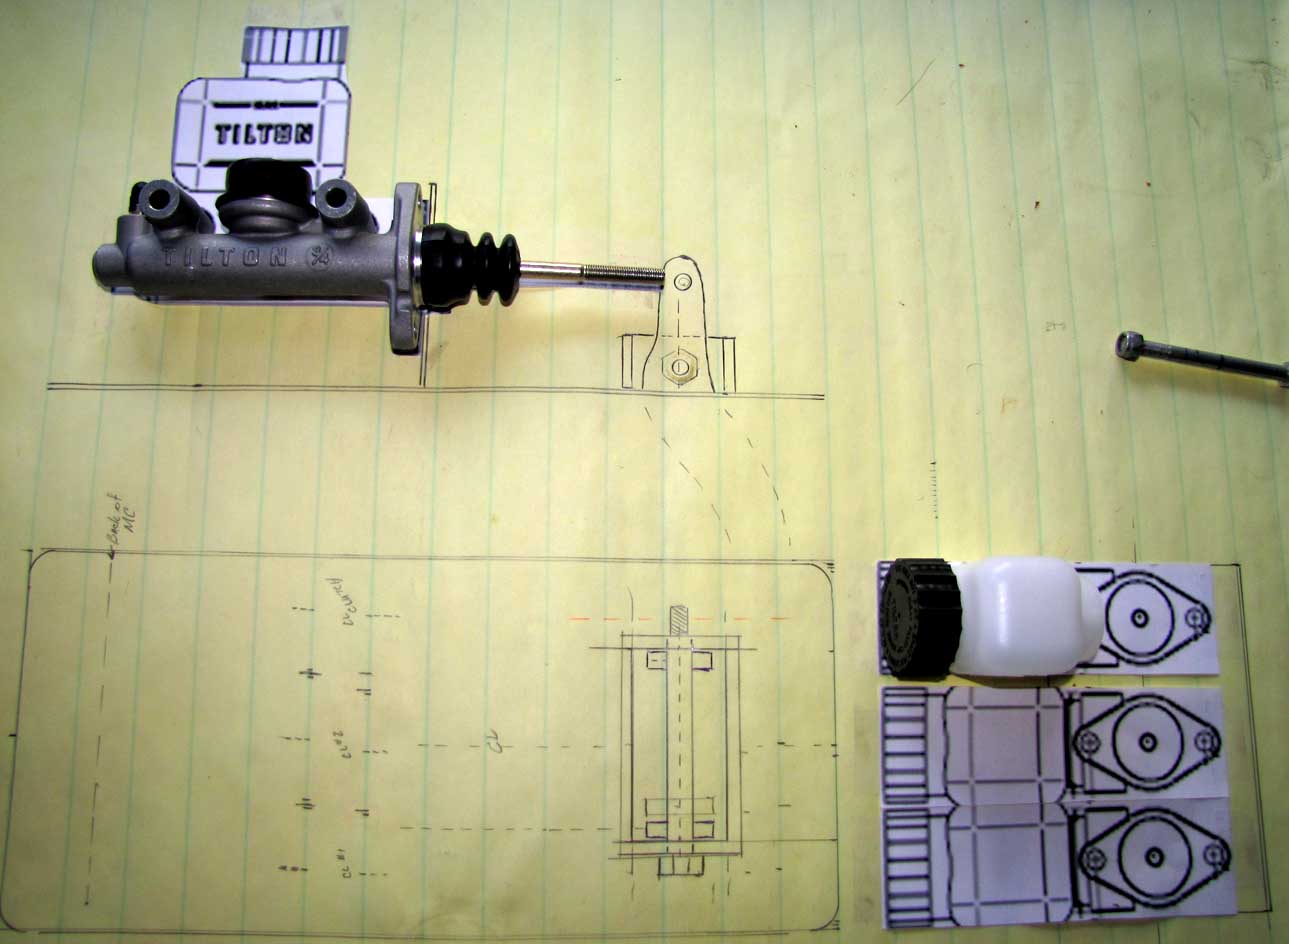
O OK, so with all that, why not have an improved Master Cyl. setup? Conversions are sold, but require expensive parts that require the opening to the brake pedals to be enlarged on a Bugeye (a NO... NO for me). So, it's back to the drawing board for an assembly using home modified pedals (lengthened) that put the whole assembly above the deck in a custom housing using Tilton M/C's for front and back brakes as well as the clutch pedal. Naturally, this was my labor intensive solution, but it works great, is easily serviceable and is bolt in. It required a seperate line adaptor for the rear brake line. Safety is an added plus with separate MC's for front and rear.
THE BOTTOM LINE:
 (click on pic to enlarge)
I have finally accomplished my desire to have a Bugeye with all of the delights that such a car could have been if the factory had budgeted about ten times the cost and 30 years of accumulated engineering knowledge since. It could be put back original, but I wouldn't want it then. The real reward is being competitive with a buddy who runs with me in his beefed 1275 bugeye that has always "barked" using a 45 Weber carb. We can be found driving the bicyclists crazy on Bay Area Backloads.
Footnote: BFD090 has won many awards - Hayward , San Juan Batista, Woodland, Dixon, Morgan Hill, Pacific Grove, and was in for exhibition at the Palo Alto Concours 2000. It's always a crowd pleaser with (happily) many questions from owners with cars in progress.
(click to enlarge)
![]() "Sprite Wall"
"Sprite Wall"
![]()
The page was last updated: Sunday, November 13, 2022